Advanced Lighting - Tunnel Lights
Author: Jepman
I will first warn that while writing this tutorial I am assuming that you are familiar with JK and JED terms. If you miss out on a certain term, visit other tutorials or the Basics section at Massassi. I can't afford to spend time on explaining every minor term and topics editors might not understand...
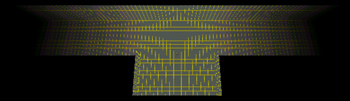
Now, I will be teaching you how to make lighting fade in your tunnels or long hallways (as seen in Fig 1). I will teach you the basics, but for the length of the fade and the intensity, I will point you in the right directions for you to do the experimenting.
Fig 1 : Tunnel Fade Example
-
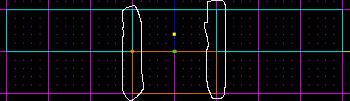
First, start off by creating four adjoined sectors as seen in Fig 2. Make sure that the two center sectors are of the same length and that the circled surfaces in Fig 2 are aligned. If they are not, it sometimes happens that the fade simply does not work and does not look right.
Fig 2 : The Sectors
-
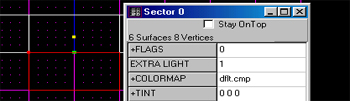
Now select the sector as seen in Fig 3, and press Enter to bring up the Sector Property window. Change the EXTRA LIGHTING in that sector to 1, while leaving all the other sectors at 0. This will make the selected sector be brighter while the others will be black without lighting.
Fig 3 : Sector Properties
-
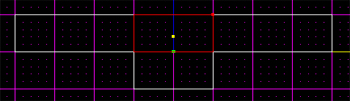
It is now the time to place the light to create the fading. Simply place a lighting unit in the center of the sector selected in Fig 4. Now simply press Ctrl+L to calculate the lighting and check it out in 3D preview. It should look fine, and then make sure you check it out in-game for it to look right!
Fig 4 : Sector to light up
-
Since the lighting technique is done now, I will quickly show you how to alternate the fade looks. If you want a 4-way or 3-way fade, then extrude a sector on the other side of the sector selected in Fig 4, and make sure its EXTRA LIGHT is at zero, and also set the EXTRA LIGHT of the sector selected in Fig 3 back to 0. To edit the length of the fade, open up the light unit's properties by selecting it and pressing Enter, and then play around with the INTENSITY and RANGE of the light.
Thank you for reading this tutorial, I really hope this will help you add some detail to your levels. Here's a screenshot of a level I made using this technique. It's a subway tunnel:
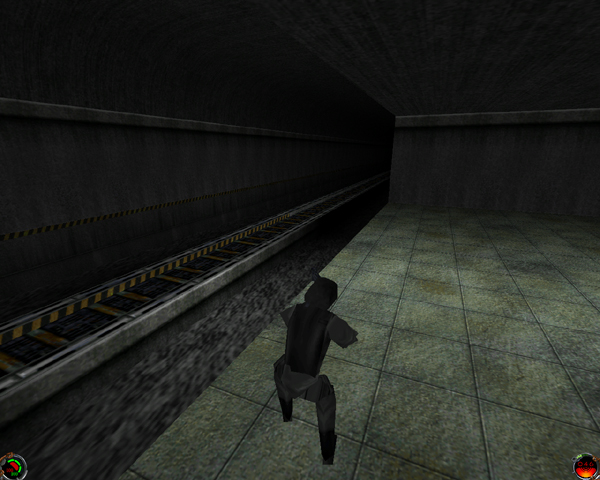
This tutorial was brought to you by Jepman of Specter Studios.