Jedi Academy Demo Walkthrough: Cult Sighting - Candrila
We've received reports from the Chandrilans that some cultists have broken into an ancient tomb that is supposedly the burial site of a Jedi Knight. Hurry there and stop them from siphoning that Force power.
You begin the mission sliding down a shaft in a passage seemingly blocked by boulders and debris. Use Force Push to clear the path. In the process you'll rid yourself of a trooper standing guard just beyond. Nice work.
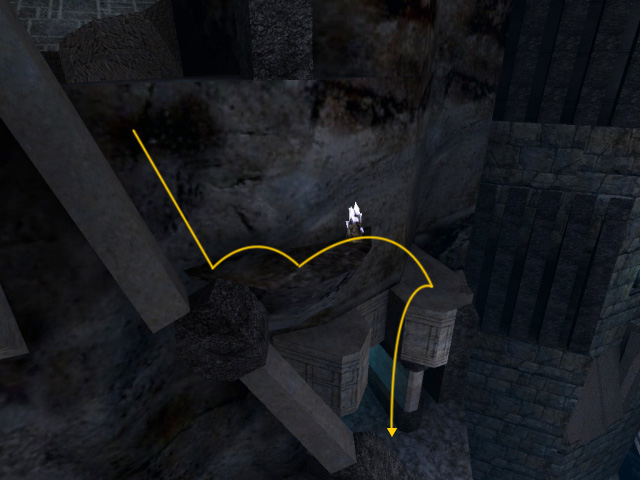
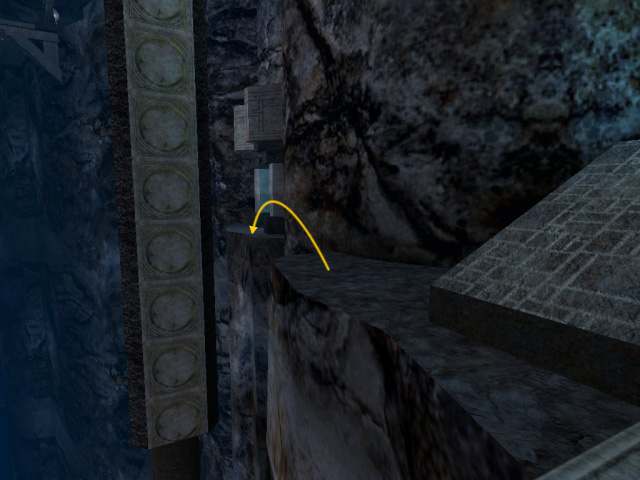
Stepping onto the terrace and looking to your right, you'll see you're in a large rift. A Cultist wielding dual sabers will drop from high above and try to surprise you. Try to stay way from the edges of terrace, as the rift is bottomless. After dispatching the Cultist, head to the ledge on the right. As you approach you'll hear a conversation between a pair of troopers below. You can drop from ledge to pillar to column without being detected. The trooper on the right is wielding a concussion rifle, so take him out first.
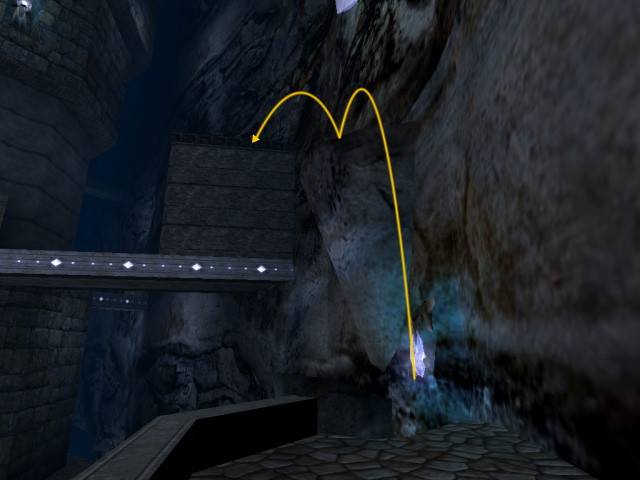
Step across the bridge and walk down the path. The Cultists standing at a terrace just beyond will more than likely have detected you and will make their way over to you. One of these Cultist has no saber, simply a Force user, but be careful; they are strong with the Force and can Push you off the ledge in no time. If you've got Force Absorb, it'll come in very handy with these guys. The narrow bridge to the right of the path you just came down is broken, but you can easily Force Jump across the space to reach the Shield Booster on the other side.
From the now-vacant terrace, head to your left and hop across the series of ledges hugging the cliff side. One of these ledges will partially collapse once you land on it, but there is another ledge just below it to catch your fall. If you have a Disruptor Rifle for this mission, you will make it easier for yourself if you take out the troopers standing guard across the rift from here.
Once you cross the narrow bridge across the rift's expanse, you can go through the doorway to the right to proceed with the mission, or jump atop the doorway on the right to access the first secret area.
The doorway leads you down a winding passage to a grand bridge. As you approach the bridge you'll hear the cues of a detonator pack being activated, and sure enough, as you step onto the bridge the det pack explodes, taking out the middle of the bridge. Force Jump across this gap to proceed to the hall and chamber beyond.

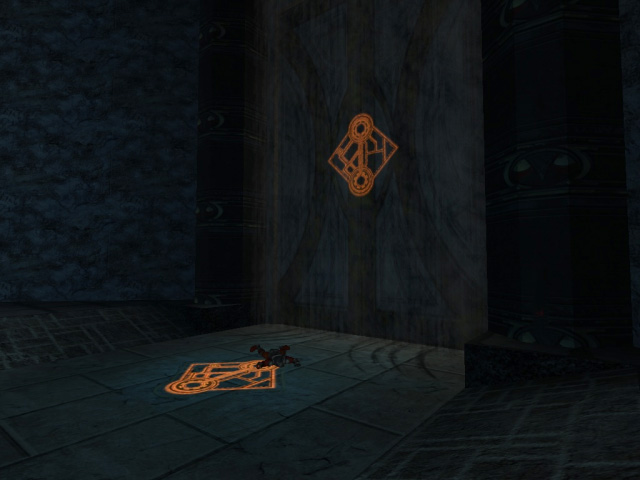
At the end of the hall three Cultist await you. The one on the left will fight you one-on-one, but the two on the right will attack you simultaneously. Once they've been eliminated, approach the door to the right and use Force Sense. This will reveal markings on the door and the floor and will allow you to open it using Force Pull. Do so to proceed. A Cultist waits for you in the hall beyond.
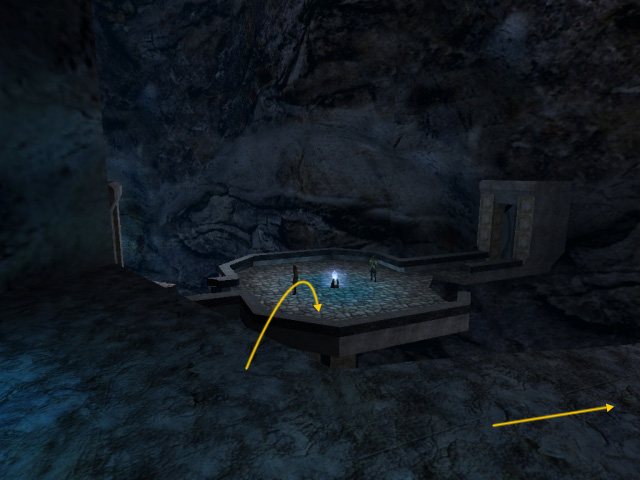
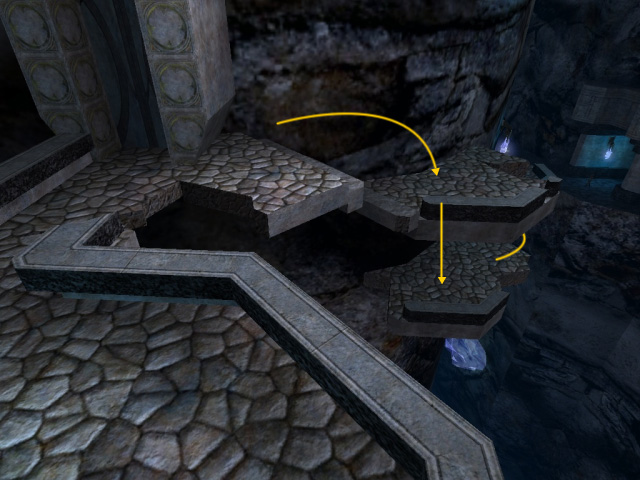
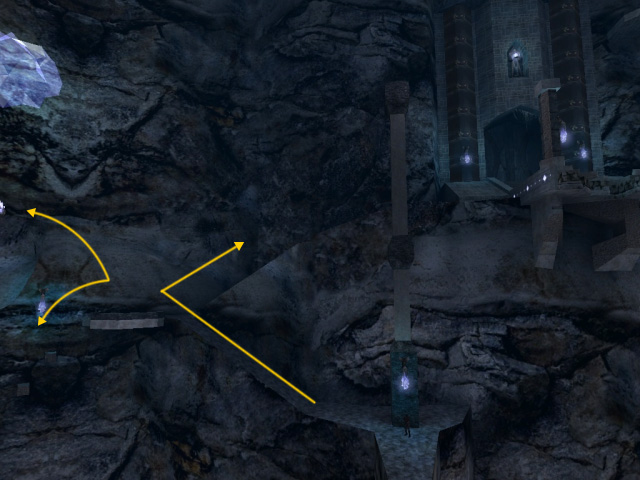
Walking to the end of this hall will bring you to a crumbling terrace. A Cultist will jump up from the ledges below to attack. Bring the fight back into the hall to avoid any frustrating Pushes. Once he's gone, head back to the terrace and angle yourself to drop down to the ledge below. Continue making your way down the ledges or pause for a moment to access the second secret area.
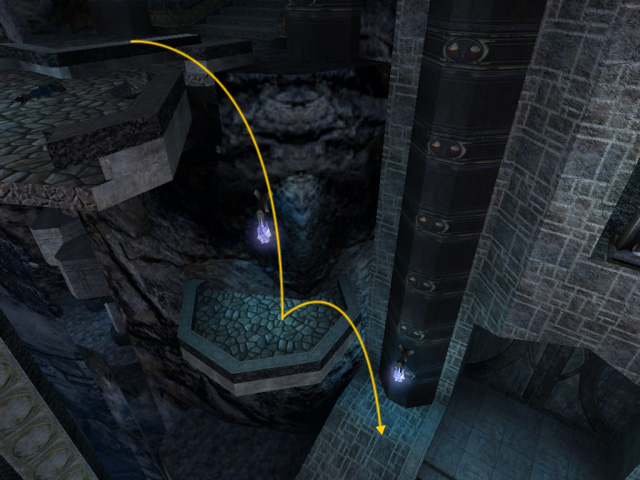
A Cultist awaits you at the landing below. You'll notice the remains of another bridge across the rift's expanse here, but this one is too wide for you to clear. While you can combine Force Speed with Force Jump to clear it, you're meant to go another way. To the left of the landing is a column that's collapsed onto the side. Jump on and slide down this column to proceed in the mission, or before you do that, head to the right of the landing to access the third secret area.
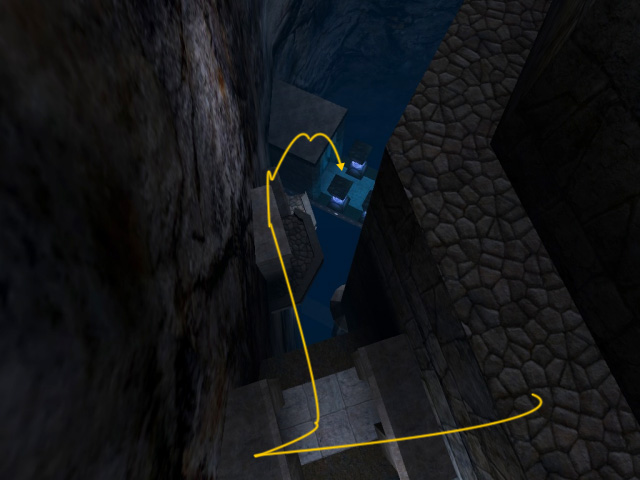
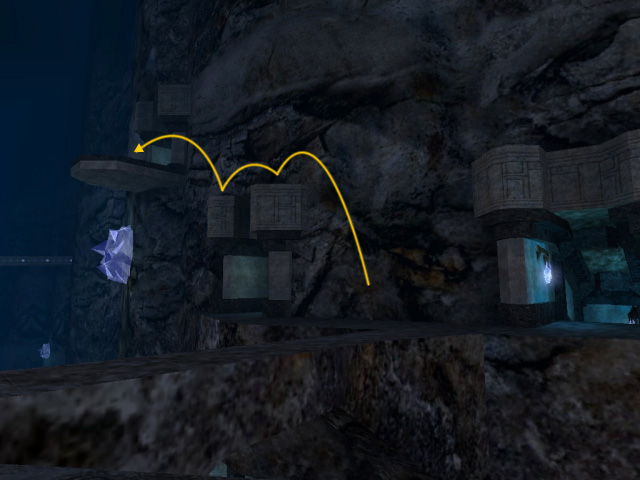
Once you've slid and dropped down from the column and ledges a trooper guarding a Shield Booster waits in an alcove to your left. Cross the narrow bridge to the right and prepare yourself for a Cultist who hides behind a column at the far end. Make your way up the path to your left to a mezzanine. Here you can do three things: 1) continue up the path to get to the landing on the far side of the collapsed bridge you just passed and take out the Cultist and trooper lying in wait, 2) drop down from the mezzanine to the space below and to the left to take out the Cultist there and proceed with the mission, or 3) have a look at the ledge hugging the cliffside above and in front of you to reach the fourth and final secret area.
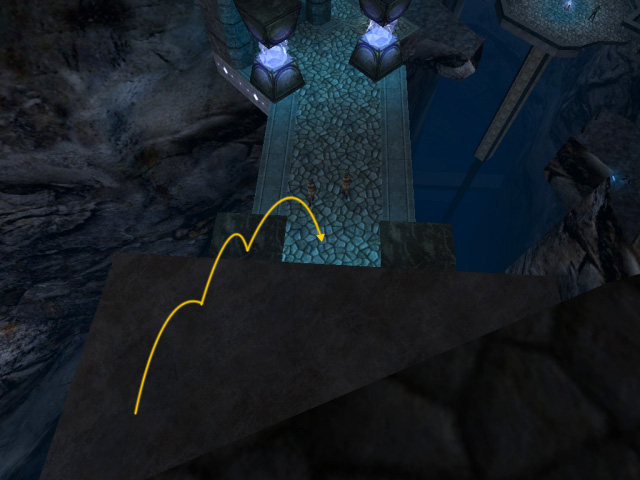
After you've eliminated the Cultist in the space below the mezzanine, cross the narrow bridge and along the narrow ledge. If you continue on this narrow ledge a Cultist waits for you at the very end, but at midpoint you will see a slim walkway below and to your right. The next stage consists of a series of downward jumps from doorway ledge to doorway ledge. You'll have made your way down completely when you reach a broad walkway lit by crystals. Cross this walkway to another narrow ledge.
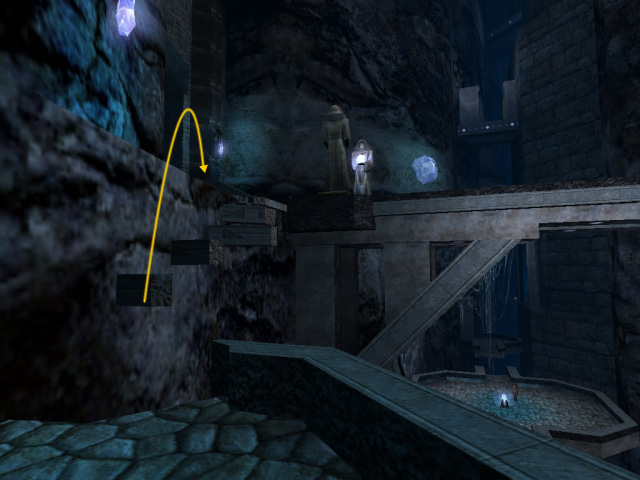
Again, at midpoint you will see another walkway you can jump down to. Before you do, you may once again want to use the Disruptor Rifle to snipe the troopers than lay ahead. Use the scope to find them and pick them off. Parts of this walkway have collapsed, but it won't collapse any further. Just jump and walk down it until you've attracted the attention of the Cultist at the far end. Battle carefully. Once they're gone jump up atop the doorway at the end of the walkway, then look to your right to jump onto the terrace you will see there.

From this point you will see where you need to get to proceed. You can either jump carefully onto the slim planks that jut out from the cliffside, or just use Force Jump to clear the whole mess and reach the landing ahead.
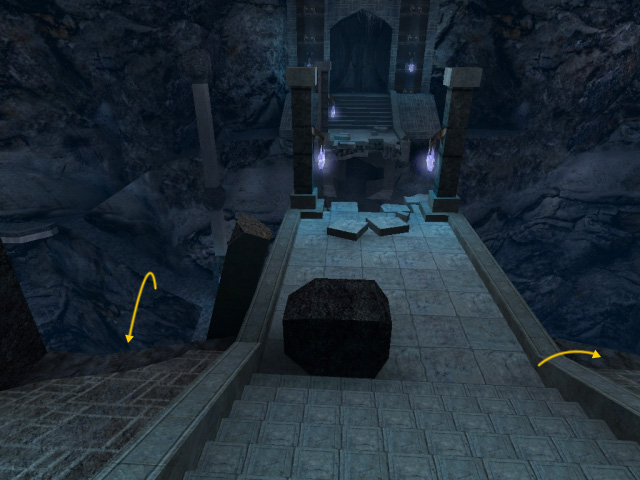
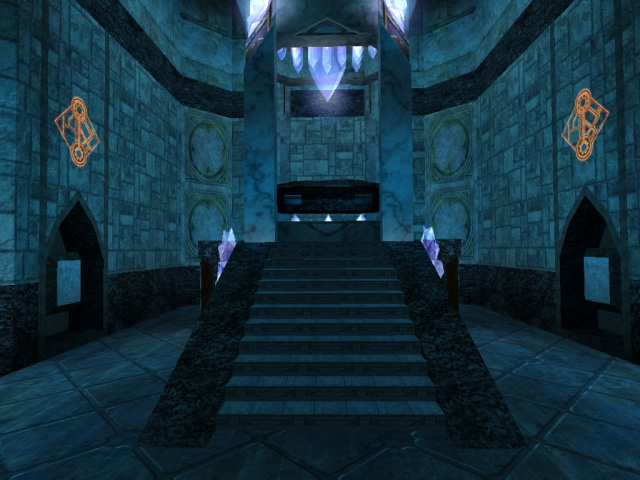
To your right is one last bridge. Don't worry, it won't collapse on you. Yet. This is the home stretch. Run across the bridge and take out the pair of Cultist that wait for you at the other end. Then proceed into the knight's tomb. Halfway into the passage two more Cultist will attack from either side. After them, there's just one more Cultist in the chamber at the end of the hall, wielding a lightstaff and guarding the actual tomb.
After getting rid of this last Cultist, you conclude you need to seal the tomb completely. In order to do this, use Force Sense to discover the markings on the walls on either side of the tomb. Fake areas of the walls directly beneath these markings will disappear to reveal square blocks. Use Force Push to move these blocks and begin the process of sealing the tomb.
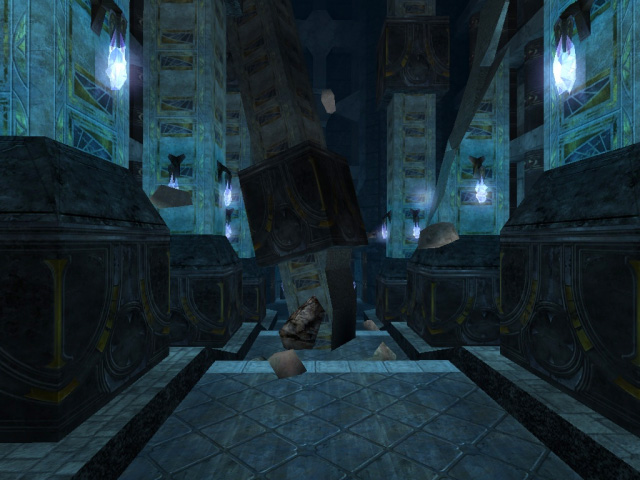
As this is happening, the tomb will begin to fall apart. This is your cue to head back down the hall and out of the tomb. Watch your head: a column will crumble and block your path, and debris will fall from high above. You're safer taking one of the slim walkays on either side of the hall.
Make your way out and back to the bridge as the tomb is sealed completely. The bridge itself will begin to crumble, so use Force Jump to make your way back across it. Once you're there, the cutscene takes over and your mission is complete.
Secrets
Secret Area 1
Go left instead of right and jump atop the doorway to reach the terrace above. A trooper armed with a conc rifle will be waiting for you. Once he's gone enter the passage to find a Shield Booster and a Medpack.
Secret Area 2
Before dropping any further, look up to the landing you dropped from and you'll find a small alcove cut into the cliff face. It's very dark, but you can use Force Sense to reveal a marking in the stone that hints at where you should jump. Rocket ammo waits for you here.
Secret Area 3
At this collapsed bridge's landing, head to the right to find a small ledge within Force Jump distance. A trooper will be standing guard with a Bowcaster. You'll find a Shield Booster here.
Secret Area 4
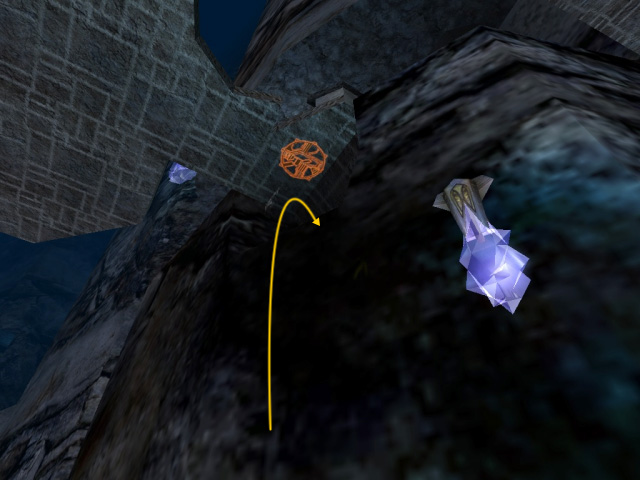
From the mezzanine, look at the cliffside above and ahead of you to find small ledge you can jump to. From here, you'll have just enough Force Jump power to make it atop the large block beyond. Along the ledges up here you will find Rocket ammo, two Medpacks and a large Shield Booster. To avoid sustaining any falling damage, head back the way you came to the mezzanine to proceed with the mission.