Making Your Own MATs
Author: Antony Espindola]
This tutorial teaches you how to add your own MAT files (textures) to your Jedi Knight/Mysteries of the Sith level and give you a few tricks, tips and hints along the way.
The tools you will need for this job are:
- MatMaster from Dark Jedi
This coverts between MAT and BMP formats - ConMan, also from Dark Jedi
This allows us to get at some of the MATs already in the game if we want to simply create our own using these as a base. - Your favourite Image Editor
I prefer to use Paint Shop Pro for creating MAT files so this tutorial will be based around it, but you can apply the same ideas to your favourite program
MATs, BMPs and Stuff
First we need a little discussion about how MAT files are used. We simply cannot just dive in and edit the MAT format as it's not supported by any image editors that I know of. That's why we need the MatMaster program as it converts it into the handy BitMap (BMP) format which is very common and the native windows image format.
We also need to be wary of the colour palette. JK/MotS uses it's own colour palettes depending on the level settings. As you should know, you need to define the default colourmap (CMP) for your level and when selecting textures you will see that some have horrible pink/purple shades in them. This is because they are not compatible with the colourmap you are using, so you need to pick a different texture. Most of the textures are grouped by using a number at the start (which appears to be a level indicator) and so if you find one texture that works with a colourmap you can guarantee that the rest of the textures in that range will also be ok.
Now we have the basics of how MATs work, let's go about making our own.
Picking a Colour Palette
The first thing we need to do is get at the colour palette so we don't go using colours that the game cannot use. The easiest way to do this is to decide on which colourmap you are going to use for your level (if you haven't already) and then pick a texture which works with it, as described above. Make a note of the name of that texture as we're going to extract that one from the GOB/GOO file it's in.
Extracting the MAT
For this example, I have chosen the 01WGRAF4.MAT file which works with the 01NARSH.CMP colourmap which I am using in my level. Using ConMan, I open the JKMRES.GOO file and go to the \MAT directory inside. There you will find all the default MAT files used in the game and so I just pick the one I want. I can now extract it from the GOB file by either using the menus or simply dragging it to a directory in Explorer.
Extracting a MAT file
Once we've extracted our MAT, we now need the palette file (CMP) it uses so we can decode the MAT file into the BitMap file. This is done by simply selecting the right CMP from the \misc\cmp directory and extracting it like we did the MAT file.
Converting between MAT and BMP
Now we need to convert it from a MAT file into a BMP file so that we can edit it. Using the MatMaster program, simply select the MAT file you just extracted and also select the palette used for the MAT. Then type in a name that you want to save your BMP files as and click Convert button. Simple as that! If the MAT file you picked has more than one image in it (called a Multiple MAT) then it will create more than one BMP file. Creating Multiple-MAT files is covered in a different tutorial by Evan C called multi-celled mats.
Using MatMaster to convert the file
Getting the Colour Palette
Now we have our BitMap image, we can run the image editor and take a look at it. What we have also done is extract all the colour information for that palette - it's all stored in the BitMap. This is why I use Paint Shop Pro because I can now use only the colours in this BitMap and I can also Save this palette out for future use. It's a good idea to save the palette with the same name as the CMP name that it's given in the game. You might also need to use this later to "reload" the palette or if you want to save the hassle of extracting the palette each time. Again, most images editors won't understand the CMP format of the palette file, so that's why we save it from the BitMap.
Editing the Picture
Now we have our MAT (as a BMP) in the image editor we can either delete the whole thing and create a new one from scratch or simply modify the existing MAT, using it as a base to create our customised MAT.
For my example in this tutorial, I am going to create some "Graffitti" on this existing MAT texture. Creating your own MATs is much harder as you have to get all the shading and colours just right to make it fit in with the quality of the other MATs used in the game. I certainly find it hard!
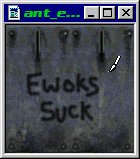
Customising an existing MAT
All I'm doing is simply painting over the top of the existing MAT file to customise it. I'm also using the 'smoothing' tool (sometimes called 'fade' or 'anti-aliasing') to make nice smooth edges to my texture - it will look much better in the game.
When you've finished editing your texture, you might want to reload the palette you saved as some image programs modify the set of colours used. If it does, reloading the palette will instantly show which colours have changed. You can then go through and change these colours (using a colour replacer or just the paint bucket) to a close colour in the original palette. We don't need to worry about this as I didn't use any extra colours this time.
Converting Back to MAT
Now I've saved my BitMap file as ANT_EWOK.BMP so that I don't get it confused with my original MAT file. Don't go replacing all the files in your GOB/GOOs otherwise you'll get some rather strange results!
Using MatMaster again, I've simply converted the BMP file into a MAT file, with the name ANT_EWOK.MAT to stop it getting confused with the others. That's it! I've created my own MAT file which I can now use in my level!
Using Your MATs
The only thing left to do is use the MAT file in your level. I've copied the ANT_EWOK.MAT file I created into the MAT directory inside my JED level directory. This allows JED to see that MAT file and you can then select it from the MAT selector (it will be in the MAT section in the top right) like you would a normal MAT texture.

Selecting the Texture in JED
The only thing left to do is create my project as a GOB/GOO file and run it. JED can automatically create GOB/GOO files for you and will also include any extra textures, cogs, 3DOs and the like you have defined in your level's directory. This saves you the trouble of creating your own GOB/GOO files.
If you do want to replace a certain MAT file from the default to your own, you can name the file the same as the MAT you want to replace. When you compile your level to a GOB/GOO, the JK engine will simply use your MAT file in the GOB/GOO instead of it's own one. Be very careful when doing this though!
Finally...
Making MATs is not that hard - it's just a case of knowing how to do it. Hopefully I've shown you an easy way to do it - there are many other ways out there but I think this is the easiest one!
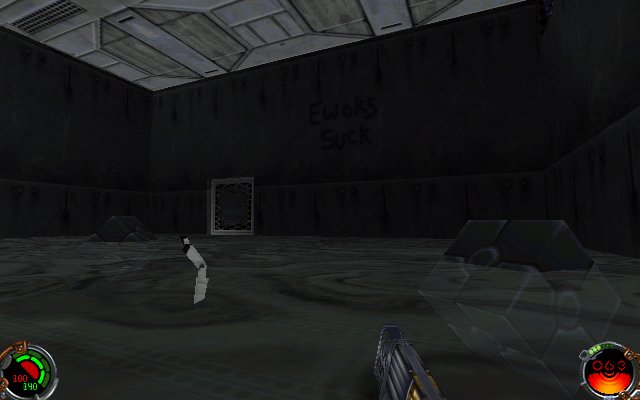
The finished article!
Have fun!
Antony.